0%

Choosing the right orthopedic implants and instruments can influence surgical accuracy, patient safety, and long-term recovery. The decision deserves more than a quick catalogue comparison. It requires clinical judgment, reliable evidence, and careful attention to each patient’s anatomy.

A practical evaluation begins with material quality, implant design, instrument compatibility, and manufacturer support. Surgeons should review documented testing, sterilization guidance, and performance data from trusted sources. Hospital teams also need to confirm traceability, staff training, and compliance with applicable medical-device requirements. Small details matter. A handle that feels unstable may slow a procedure. A poorly matched screw system can create avoidable frustration during fixation.

Experience often reveals what product brochures miss. Instrument balance, visibility at the surgical site, and ease of cleaning can affect real-world performance. Yet personal preference should not replace evidence. That is an important limitation. A familiar device may feel comfortable while newer research suggests a better option. Teams should compare independent clinical findings, manufacturer documentation, and feedback from trained users.

This guide presents seven practical tips for choosing orthopedic implants and instruments with greater confidence. It considers patient needs, surgical technique, product quality, supplier reliability, and total cost. No single device suits every case. Careful questions lead to safer decisions. The final choice should remain collaborative, documented, and consistent with professional standards.
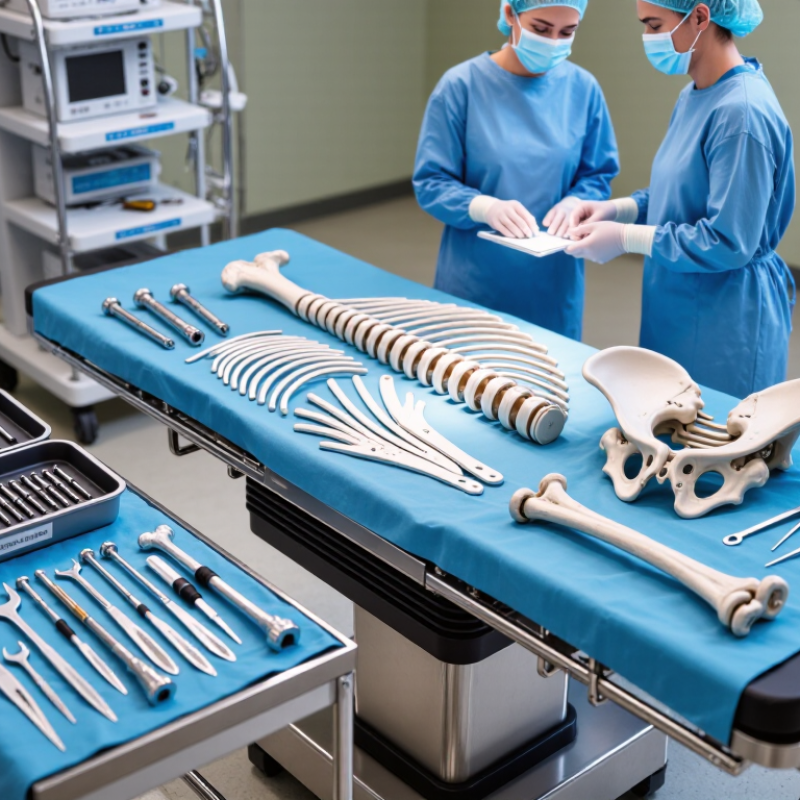
7 Tips for Choosing Orthopedic Implants and Instruments

Define the Clinical Problem and Desired Treatment Outcome

Define the Clinical Problem and Desired Treatment Outcome

Implant selection should begin with the patient’s actual clinical problem, not a product catalogue. Osteoarthritis, trauma, deformity, infection, and revision surgery demand different strategies. The World Health Organization estimates that 1.71 billion people live with musculoskeletal conditions worldwide. That scale makes precise diagnosis essential.

A clear outcome must be measurable. It may include reduced pain, improved walking distance, restored joint stability, or durable fixation. Discuss these targets with the patient before choosing implants or instruments.

The OECD’s Health at a Glance 2023 report shows substantial international variation in hip replacement rates. This suggests that disease burden, referral patterns, and treatment decisions all influence procedure numbers.

A high volume does not automatically prove better care.

A clean operative plan can still be wrong. Consider bone quality, soft-tissue balance, alignment, activity level, allergies, and future revision access.

Instruments should support accurate preparation and consistent execution. They should not dictate the procedure.

Experienced teams can compare registry evidence, peer-reviewed studies, and local complication data before finalizing the system. The National Joint Registry also demonstrates why long-term revision tracking matters, because early function can hide later failure.

Record the intended outcome, the acceptable risk, and the backup plan. Then reassess whether the selected implant truly serves this patient.

Match Implant Materials and Designs to Patient Anatomy

Choosing orthopedic implants and instruments begins with the patient, not the product catalogue. Bone density, joint geometry, age, activity level, and previous surgery all influence the decision. A larger implant may appear stronger, yet it can damage surrounding bone when the anatomy is narrow. A smaller design may preserve bone but provide less stability. The fit must be tested against imaging, physical findings, and the surgical plan.

Tip 1: Match the material to the patient’s biological needs. Titanium alloys may offer useful elasticity and imaging advantages, while cobalt-chromium can provide high wear resistance. Ceramic components may reduce friction, but they require careful handling and precise alignment. Material selection should also consider allergies, bone quality, expected loading, and possible revision surgery. Do not rely on one scan alone. Small anatomical differences matter.

Tip 2: Check design compatibility before opening the instrument set. Trial components should reproduce the planned alignment, offset, and range of motion. Instruments must support controlled preparation, especially in hard or fragile bone. In practice, measurements can disagree. That is uncomfortable, but common. Surgeons should pause when the implant feels technically acceptable yet anatomically wrong. Tip 3: Document the reasoning, including rejected options and intraoperative changes. This improves communication among surgeons, nurses, engineers, and patients. It also exposes weak assumptions, which are easy to miss when a familiar design seems convenient.

7 Tips for Choosing Orthopedic Implants and Instruments — Match Implant Materials and Designs to Patient Anatomy
Tip Patient Anatomy or Clinical Factor Implant Material or Design Consideration Instrument Selection Clinical Rationale Important Checks
1Assess bone quality first Osteoporotic, elderly, revision, or otherwise weakened bone may provide reduced screw purchase and lower resistance to fixation failure. Consider fixation designs that improve purchase, such as appropriate screw length, locking constructs, variable-angle locking options, or cement augmentation when clinically indicated. Use calibrated drills, depth gauges, taps, insertion drivers, and torque-limiting tools that correspond to the selected fixation system. Bone density and cortical thickness influence pull-out resistance, construct stability, and the amount of fixation required. Evaluate imaging, cortical purchase, screw trajectory, available bone stock, and the risks associated with cement or additional fixation.
2Match material to the application Load level, anatomical location, allergy history, expected healing, and the possibility of future imaging or revision all affect material choice. Titanium alloys are widely used because of biocompatibility and an elastic modulus closer to bone than stainless steel. Cobalt-chromium alloys offer high strength and wear resistance. Stainless steel provides strength and is used in selected fixation applications. PEEK is radiolucent and may support imaging visualization in specific applications. Confirm material compatibility between instruments, implants, guides, trays, and sterilization processes. Material properties influence strength, stiffness, wear behavior, artifact production, and compatibility with the intended procedure. Check documented material composition, corrosion considerations, MRI conditions, patient sensitivities, and whether dissimilar metals will contact one another.
3Choose geometry that follows anatomy Anatomical curvature, medullary canal shape, joint alignment, soft-tissue coverage, and patient size vary substantially. Select implants with suitable length, width, thickness, curvature, offset, hole spacing, and available size range. Anatomical or contoured plates may reduce the need for excessive intraoperative bending. Use sizing trials, templates, contouring instruments, alignment guides, and radiographic or navigation references when appropriate. Close anatomical fit can improve alignment and reduce prominence, soft-tissue irritation, and unnecessary alteration of the implant. Confirm fit on preoperative imaging and intraoperative assessment. Avoid excessive plate bending or modification that could damage the implant or compromise its function.
4Plan fixation for the load environment Weight-bearing bones, high-motion joints, osteotomy sites, fractures, and fusion procedures experience different mechanical demands. Use a construct appropriate to the expected loads: compression, neutralization, buttress, bridge, tension-band, intramedullary, or fusion-oriented designs as clinically indicated. Ensure correct use of reduction tools, compression devices, guidewires, reamers, insertion handles, and torque-control instruments. Implant design should support the intended mechanical objective without creating excessive stiffness or stress concentration. Review fracture pattern, gap size, load sharing, working length, screw distribution, alignment, and the patient’s expected activity level.
5Consider soft tissue and neurovascular structures Limited soft-tissue coverage, superficial bone, scarred tissue, and nearby nerves or vessels can increase the consequences of implant prominence or inaccurate instrumentation. Prefer low-profile, anatomically contoured designs when appropriate. Select screw trajectories and implant positions that respect safe corridors. Use tissue protectors, drill sleeves, depth-control features, guide pins, retractors, and image guidance when required by the anatomy or procedure. Reducing prominence and controlling instrument paths may help limit soft-tissue irritation and avoid injury to adjacent structures. Map relevant anatomy, verify drill and screw depth, confirm implant position with imaging, and assess prominence before final closure.
6Account for imaging and future revision Patients may require postoperative radiographs, CT, MRI, or later revision surgery. Implant location and material can affect imaging quality and surgical access. Radiolucent components can improve visualization in selected situations, while metallic implants may create artifact. Modular or removable designs may facilitate revision when clinically appropriate. Use radiolucent positioning aids or compatible imaging accessories when needed, and maintain instruments that support controlled implant removal. Future diagnostic clarity and revision planning are important parts of long-term implant selection. Verify MRI safety conditions, expected artifact, implant labeling, removal compatibility, and the availability of the correct extraction tools.
7Verify the complete system and workflow Patient-specific anatomy, surgical approach, staffing, sterile processing capacity, and the complexity of the planned procedure influence system suitability. Choose an implant system with sufficient sizes, compatible fixation options, predictable instrumentation, and clear instructions for use. Confirm tray completeness, instrument functionality, calibration, sterilization compatibility, backup sizes, and availability of emergency or removal instruments. A technically suitable implant can still create risk if the required instruments, sizes, or procedural steps are unavailable or incompatible. Complete a preoperative checklist, inspect implants and instruments, confirm expiry and package integrity, and follow applicable regulatory and institutional procedures.
Selection should be based on patient-specific anatomy, diagnosis, imaging, surgical technique, documented device instructions, and the judgment of a qualified orthopedic surgical team.

Assess Instrument Precision, Compatibility, and Sterilization

Orthopedic implant selection begins with instrument precision. Check cutting edges, drill guides, depth gauges, and locking mechanisms under bright light. Even minor wear can change alignment or screw trajectory. Ask for documented accuracy testing, not only a smooth demonstration. The 2024 Australian Orthopaedic Association National Joint Replacement Registry reports that revision risk varies by implant design, fixation method, and patient factors. Instruments cannot correct a poorly matched system. Confirm that each guide, tray, screw, and implant belongs to the same validated system. Compatibility matters.

Review the manufacturer’s instructions for use and verify sterilization limits before purchasing. Steam exposure, temperature, drying time, and packaging can affect instrument performance. Complex joints and narrow lumens deserve special attention. The WHO Global Guidelines for the Prevention of Surgical Site Infection notes that infections affect about 2%–5% of surgical patients in high-income settings, with higher rates elsewhere. Clean is not automatically sterile. Use biological and chemical indicators according to facility policy, and record every cycle. Also inspect hinges, cannulated tools, and trapped debris after cleaning. A checklist helps, but it can become routine theater. Let technicians report recurring problems, then change the process. Trial the set with real surgical workflows, because catalog descriptions rarely reveal awkward handling. When evidence is incomplete, pause and investigate.

Compare Safety Evidence, Quality Standards, and Manufacturer Support

7 Tips for Choosing Orthopedic Implants and Instruments

Safety evidence should guide every purchasing decision. Review peer-reviewed studies, post-market data, and published complication rates. Do not rely on a polished brochure alone. Ask whether the evidence matches the implant’s intended procedure and patient population. Independent clinical feedback can reveal handling problems that formal documents miss.

Quality standards deserve close inspection. Confirm material specifications, batch traceability, sterilization validation, and inspection records. Check whether instruments fit the implant system precisely. Small alignment errors can affect surgical control. Request clear documentation for manufacturing quality and applicable regulatory requirements. Also examine packaging integrity, shelf-life information, and instructions for storage. Details matter.

Manufacturer support is practical, not decorative. Evaluate training, surgical planning assistance, replacement procedures, and response times. Ask who answers urgent technical questions during a case. A reliable support team should provide current instructions and honest limitations. I have seen teams focus heavily on price, then underestimate repair delays and staff training costs. That choice can create pressure in the operating room. Try the instruments, when possible, under realistic conditions. Check grip comfort, visibility, balance, and cleaning access. Speak with surgeons, nurses, and sterile-processing staff. Their experiences may disagree, and that disagreement deserves attention.

Plan Surgical Workflow, Training Needs, and Long-Term Follow-Up

7 Tips for Choosing Orthopedic Implants and Instruments

Choosing an implant is only one part of surgical planning. The complete workflow should cover case scheduling, tray availability, imaging, sterilization, and postoperative review. The World Health Organization reports that one in ten patients experiences harm during healthcare, and more than half of this harm is preventable. That figure makes preparation practical, not ceremonial. A clear instrument checklist can prevent delays when a small reamer or trial component is missing. I have seen teams focus heavily on the implant, while overlooking room layout and handoff timing. That gap deserves honest review.

Training should match real operating conditions. Run short simulations with the actual trays, imaging devices, and backup components. Ask staff to identify the implant sizes without opening every package. Keep the exercise uncomfortable. It reveals weak points. The American Joint Replacement Registry’s 2024 Annual Report includes data from more than three million hip and knee procedures, supporting the value of structured, long-term outcome tracking. Record alignment, pain scores, function, revisions, and complications using consistent definitions. These measures help teams compare performance across time, not just across surgeons.

Follow-up planning should begin before surgery. Schedule early wound checks, rehabilitation milestones, and later radiographic assessments. Patient-reported outcomes can expose problems that a routine image misses. Not every complication reflects poor technique; some cases remain unpredictable. Still, unexplained variation should trigger review, training updates, or workflow changes. In practice, the best implant choice is the one supported by a prepared team and a traceable follow-up process.

FAQS

What should guide orthopedic implant selection?

Start with the patient’s clinical problem, not a product catalogue. Consider arthritis, trauma, deformity, infection, or revision needs. Define measurable goals, such as less pain, longer walking distance, or stable fixation.

Which patient factors affect implant size and design?

Bone density, joint shape, age, activity level, allergies, and previous surgery all matter. A large implant may damage narrow bone. A smaller design may preserve bone but reduce stability. The fit must match imaging and physical findings.

How should implant materials be evaluated?

Match material properties to biological needs and expected loading. Some alloys provide elasticity or wear resistance. Ceramic parts may reduce friction but demand careful handling and alignment. Future revision surgery also matters.

Why should teams compare more than one imaging result?

Measurements can disagree. That is common. Compare scans with physical findings and the surgical plan. If an implant feels technically acceptable but anatomically wrong, pause before proceeding.

What should trial components demonstrate?

Trial components should reproduce planned alignment, offset, stability, and movement. Test them through realistic surgical steps. A smooth trial does not prove a correct fit.

How can teams assess instrument precision?

Inspect cutting edges, drill guides, depth gauges, and locking parts under bright light. Small wear can alter alignment or screw direction. Request documented accuracy testing, not only a polished demonstration.

How can teams confirm system compatibility?

Verify that guides, trays, screws, and implants belong to one validated system. Check compatibility before opening the set. Instruments cannot rescue a poorly matched implant system.

What sterilization details deserve attention?

Review temperature, steam exposure, drying time, packaging, and sterilization limits. Inspect hinges, narrow channels, cannulated tools, and trapped debris. Clean is not automatically sterile.

How should surgical teams improve their process?

Record the intended outcome, acceptable risk, backup plan, and reasons for rejected options. Track complications and later revisions. Checklists help, but they can become routine theater. Staff should report recurring problems, even when the process seems familiar.

Conclusion

Choosing the right orthopedic implants and instruments begins with clearly defining the clinical problem, the patient’s functional goals, and the desired treatment outcome. Surgeons should evaluate anatomy, bone quality, activity level, and relevant medical conditions before selecting an implant material and design. The chosen solution should provide appropriate stability, anatomical fit, durability, and compatibility with the planned procedure while allowing for patient-specific considerations.

Instrument selection is equally important. Tools should offer precision, dependable performance, compatibility with the implant system, and reliable sterilization capabilities. Decision-making should also include safety evidence, quality standards, manufacturer support, training requirements, and the availability of technical guidance. A well-planned surgical workflow can reduce delays and improve consistency, while appropriate staff education helps ensure instruments are used correctly. Finally, follow-up planning should address healing, function, possible complications, and long-term implant performance, supporting informed decisions throughout the patient’s care journey.

Ethan

Ethan

Ethan is a professional marketing specialist dedicated to helping businesses understand products, markets, and practical solutions through clear, reliable, and insightful communication. With extensive knowledge of the company’s product portfolio, industry trends, and customer needs, he regularly......